
New Products
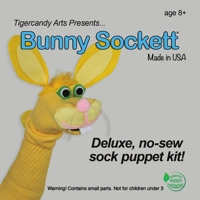
Bunny Sockett® Assembly Directions
For this Bunny sock puppet project you will need:
Bunny Sockett® kit
*craft scissors
*hot glue gun/glue
*Always Supervise children when these items are in use. 
For BEST Results Follow These 6 Sugggestions:
- Read through all of the directions at least once before begining assembly.
- Assemble all the parts before gluing them to the puppet.
- Practice placing parts before gluing them to the puppet so they go exactly where you want them to.
- Use the included chalk to mark placement when necessary.
- Keep in mind that hot glue dries very quickly. Use small drops of glue and glue as you go. This will be illustrated in different sections of the directions.
- Have Fun!!

ASSEMBLE EARS: To assemble the ears first make sure they are facing in the correct direction then glue the inner ear to the center of the outer ear. Start with the stem [1] and work your way up [2] .
Add glue to one side of the stem about an 1.5" [3]. Pinch and hold closed to adhere [4]. Slide Ear Buttons onto ear stems making sure both ears are the same height [5]. Put ears aside.
CHEEKS: To assemble the Cheeks add glue part way up the center of the Cheek Split avoiding the top where it extends above the Cheeks [1]. Adhere Cheek Split to the Cheeks and carefully glue down the rest of the Cheek Split one side at a time [2].
Turn Cheeks over and add glue down the center. Be careful to avoid the top part that extends above the cheeks [3]. Adhere Cheeks to the puppet base appoximately 1/4" above the mouth[4]. Glue down the rest of the Cheek one side at a time [5].
WHISKERS: Glue Whisker bundle directly above the Cheeks and beneath the Split as shown [1]. Trim off the remainder of the Cheek Split [2]. Glue Nose on top of Whiskers [3] Put the puppet all the way on your hand and make two chalk marks (no more than 1" apart) just below your knuckles for the Ears. Make another pair of chalk marks below and between the first set, on your finger joints, for the Eyes. This set should be side by side [3].
ATTACH EARS: To place the Ears, trim the ear stem leaving about 1/8" inch of the stem [1]. Make sure both ears are the same height then add glue to the underside of the button in the CENTER only making sure to add glue on and around the stem [2]. Adhere Ear to chalk mark on Bunny [3] Carefully glue down the rest of the Ear Button [4].
EYES: Good eye contact is the secret to an engaging puppet! The BEST way to achieve good eye contact is to triangulate the pupil. This means avoid gluing the pupils dead center in the whites. Rather, place ever so slightly towards the inner edge [1], forming an invisible triangle with the nose. Remember, Do Not add any glue until you have achieved your desired placement. Add glue to the FRONT of the eye tab [2] and glue to chalk mark [3]. Repeat with second eye. 
Glue the Eye Pom to eye tab then glue the back of the Eye to the Pom [4]. 
TAIL & TEETH: Choose a place for the tail and glue it to the sock [1]. Add glue to the Front top 1/3 of the teeth [2]. Glue teeth to the roof of the puppet's mouth [3].
HAIR TUFT & FLOWER: Glue the flower together [1]. Before adding any glue, center the Hair Tuft between the Ear Buttons. Use the chalk to mark where the top edge of the Hair Tuft will be glued down. Add glue to the top 1/3 of the back of the Tuft [2] and adhere to the chalk mark. Then glue down the rest of the Tuft [3]. 