
New Products
Lion Sockett® Directions
For this project you will need:
1 Lion Sockett® Kit by Tigercandy Arts, Inc.
1 hot glue gun & 1-2 glue sticks (ALwAYS supervise children when a glue gun is in use!)
1 pair of good craft scissors (ALWAYS supervise children when a scissor is in use!)
Photos intended to Accompany not replace written directions. For BEST results:
- Read through ALL of the directions before begining assembly.
- Assemble all the parts before gluing them to the sock puppet.
- "Check twice, glue once!". Practice placing parts before adding glue so they go exactly where you want them to.
- Use the included chalk to mark placement.
- Keep in mind that hot glue dries very quickly. Unless otherwise indicated, use small drops of glue and glue as you go rather than adding all the glue at once.
- Have Fun!!
PUPPET ASSEMBLY:
ASSEMBLE EARS: {*Hint* Make sure Ears are facing the correct direction before adding any glue}. Center the Inner Ear inside the Outer Ear aligning the bottom edges. Glue Inner Ear to Outer Ear in sections starting from the botton [1] and working up [2]. 

ASSEMBLE NOSE: Gather the Nose Bridge, Nose, Lip Split, & Whiskers [1]. Center and Glue Nose Bridge on Nose [2] then, center and glue Whiskers onto Nose Bridge [3] then, center and glue Lip Split on top of Whiskers [4]. Turn whole piece over so Lip Split is on the bottom and the Nose is on top [5]. 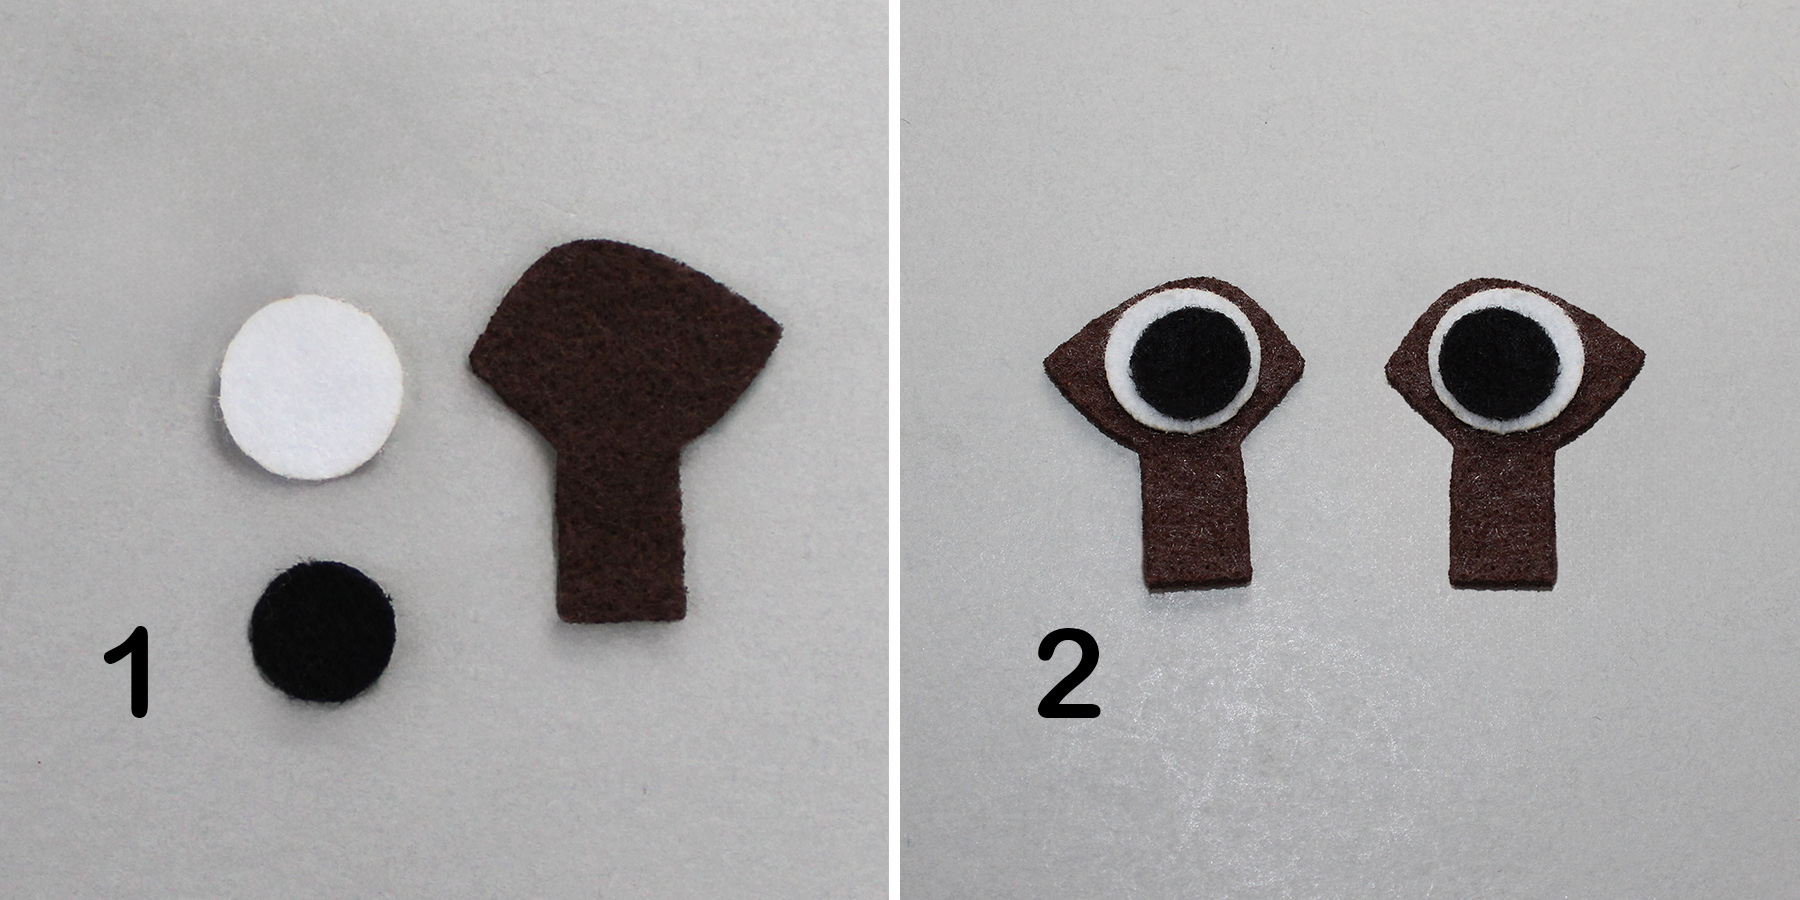
ASSEMBLE EYES: Good eye contact is the secret to an engaging puppet! The BEST way to achieve good eye contact is to triangulate the pupil. This means avoid gluing the pupils dead center. Instead, place them ever so slightly towards the lower inner edge, forming an invisible triangle with the nose. Gather the Eye Base, Sclera, & Pupil [1] Glue together as shown [2]. Remember, Do Not add any glue until you have achieved your desired placement!

ASSEMBLE TAIL: {*Hint* taping the tail knot to your work surface can help with this part}. Seperate the yarn into three equal segments [1]. Braid Tail [2] Use Tail Tie to secure end [3] Trim excess [4]. With the Tail lying flat, glue one end to the center of the Tuft [5] Add glue to one side of the tuft [6] Fold over the end of the Tail. Add glue to the other side of Tuft [7] Fold to meet first [8].
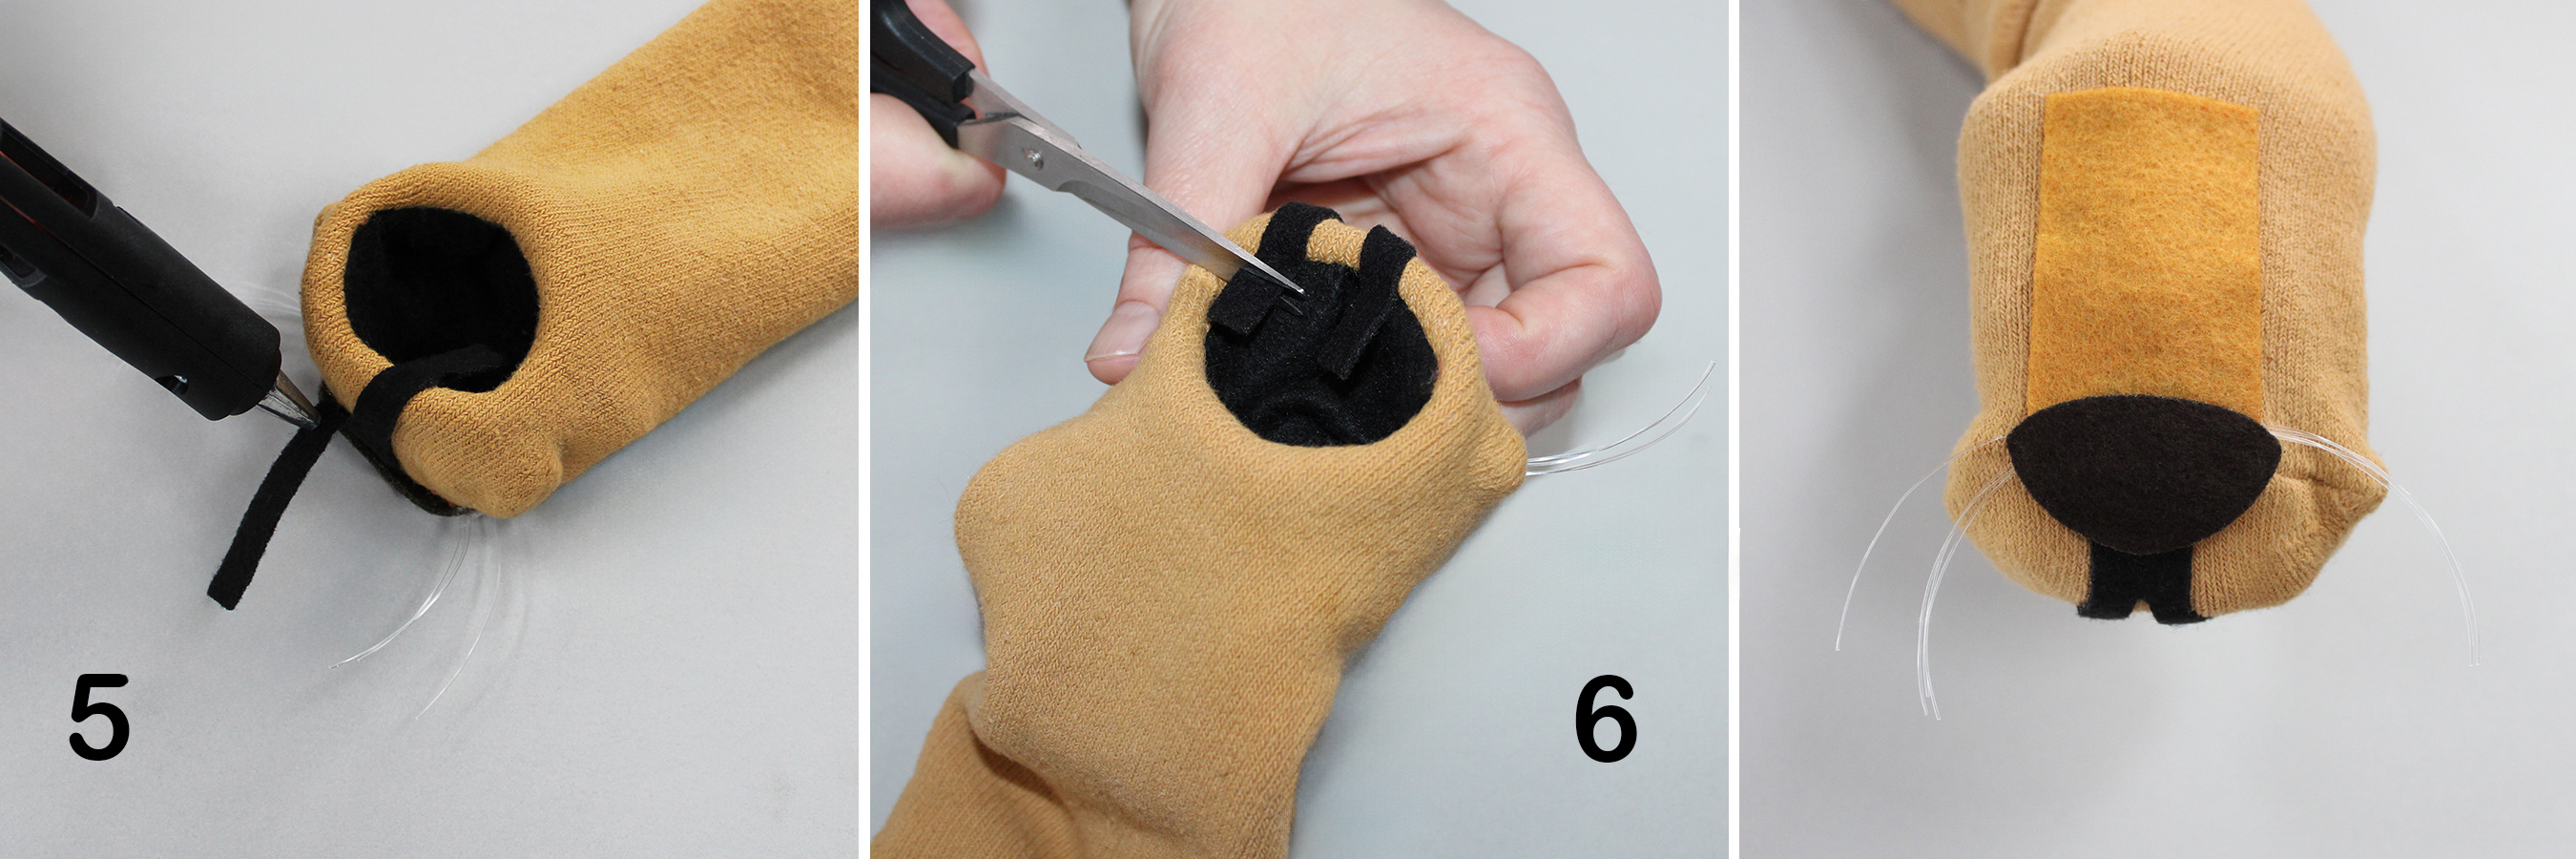
ATTACH NOSE: On the back of the Nose, add a few drops of glue where shown [1] and adhere to toe seam [1]. Working in stages, glue Nose Bridge to sock [2-3] Next, glue down the top of the Lip Split [4]. Turn puppet over and gently seprate the two strands. Slowly and carefully, glue them down, over the lip and into the mouth [5]. Trim the excess [6]. 
PERFECT PLACEMENT: Put the puppet all the way on your hand and make two chalk marks on your knuckles for the Ears (marks should be at a slight angle about 2.5" apart) [1]. Make another pair of chalk marks below and between the first set, on your finger joints, for the Eyes [1]. Put a line of glue along the bottom edge of Ear [2] adhere to chalk mark [3].

ATTACH EYES: Add glue to the FRONT of the Eye tab as shown [1] Adhere tab to chalk mark [2]. Glue Eye Pom to Eye tab [3]. Glue Eye to Eye Pom[4]
ATTACH MANE: Plce Mane with backing side facing up. Place a line of glue doen the center [1]. Adhere to puppet directly behind the Ears [2]. Working in stages, glue the rest of the Mane down [3]. Carefully, Add more glue where needed [4].
ATTACH TAIL: Slide the Tail Button over the Tail knot [1]. Add glue on and around the knot [2]. Glue to sock on or near cuff [3]. Lift Tail Button and neatly glue down the edges [4].
ATTACH TEETH: Align Teeth [1] Put a line of glue along the top of tooth [2] adhere to the inside of the Lion's mouth making sure Teeth are curving inward. [3]. Add more glue if necessary. 